
So, it’s the August long weekend and you have nothing to do …
Ok, I know that’s absolutely impossible – with Ribfests happening across Ontario (I’ll be all over London’s Ribfest!), prime camping time AND a three-day stint off work – but there may be a few hours here and there that you might just have to yourself for some photography fun. My suggestion is to try a little light painting. It’s as easy as picking up something that burns brightly or casts a good light. Sparklers, glow sticks, flash lights, laser pointers and various burny things (extreme caution, please!) all make for great ‘brushes’ in the dark.
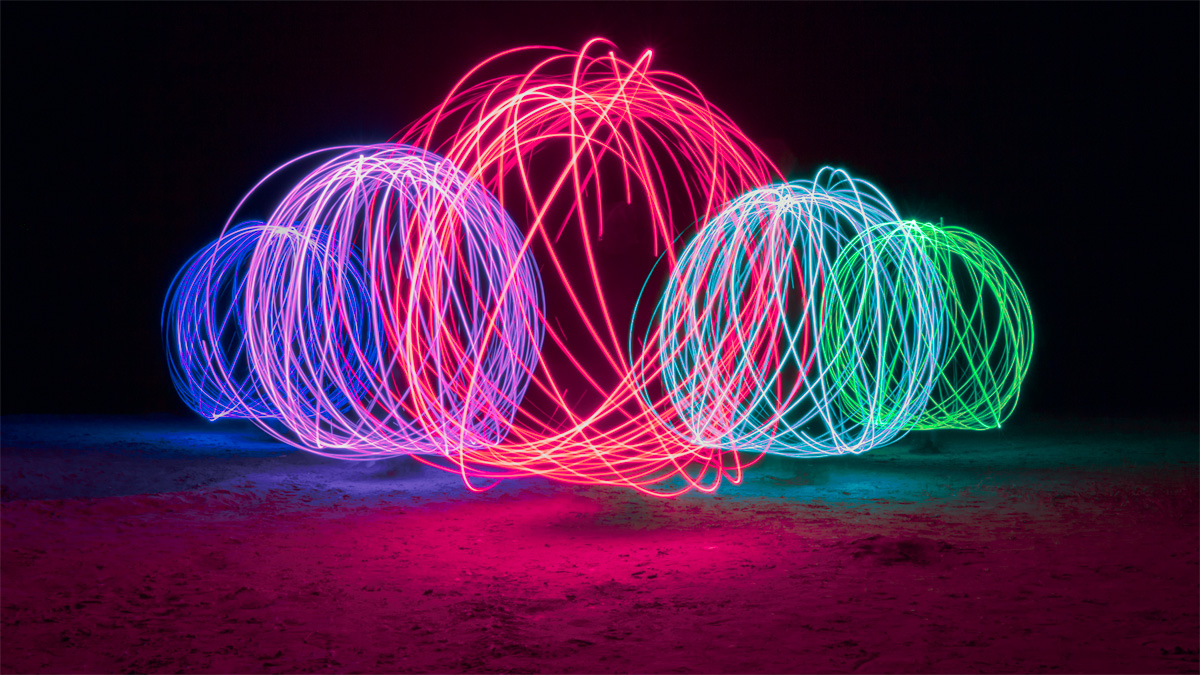
This image is a composite of five separate exposures using a road flare attached to the end of a rope with electrical tape.
You’ll need some very basic equipment, including a camera, a tripod (or bean bag), some things that light or glow and a place to use them. Keep in mind that it’s always “safety first”: if you’re using something that you have to light on fire, take every precaution to not set yourself, those you’re with or your surroundings on fire. That last part is really important. Please don’t refer back to this post with a “but Jay told me to do it!” No, I did not. That’s my official line.
However … 😉 … if you feel so inclined to try it, road flares and steel wool work equally well for light painting some very cool patterns. My favourite place to use them to-date is a big, open beach. Large areas of open concrete, such as a parking lot or skate park, can also produce some very dramatic images (but you’ll likely have to explain to someone why you’re spinning burning materials over your head in the middle of town. Just sayin’ …). Flares are lit with their end caps, just like wooden matches, and the steel wool can be carefully stuffed inside a wire whisk and lit with a 9-v battery. You can buy either at most hardware stores.
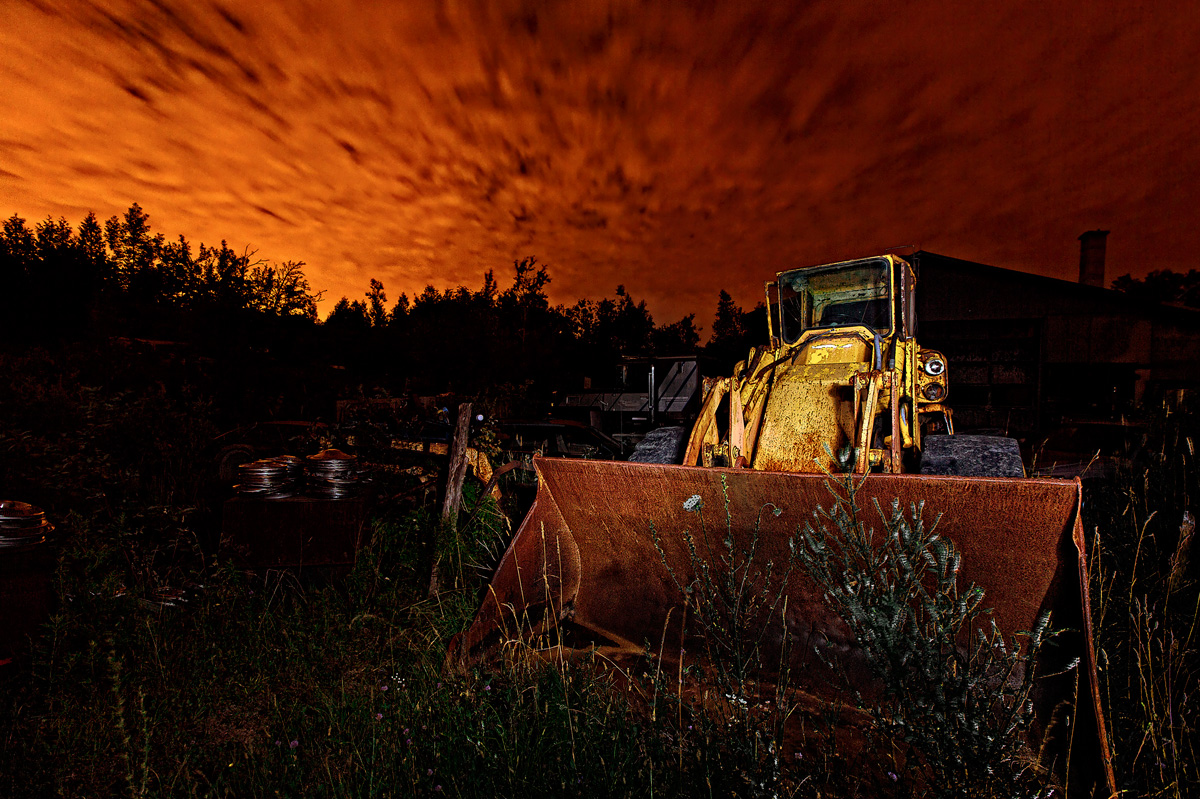
Junk yards have a nearly endless supply of cool things to ‘paint’ with a flash light. Even better when you can catch the glow from town in the sky.
As these are long exposure captures, I usually aim to expose each frame for an average 20-30 seconds and always on a tripod to reduce shake (although, hand holding while light painting could produce some interesting effects, too). My aperture will be set anywhere from f/8 – f/16, depending on how much of the scenery I want included with the light, and my ISO is always set at 100 (or whatever your lowest non-expanded ISO value happens to be). Use a flash light to illuminate the person holding the light in order to set your focus or, if it’s just you, set an object where you’ll be standing and focus on that. Wide angle lenses work very well for light painting. My go-to is the Canon 16-35mm f/2.8L (but the 24-70mm would work just as well).
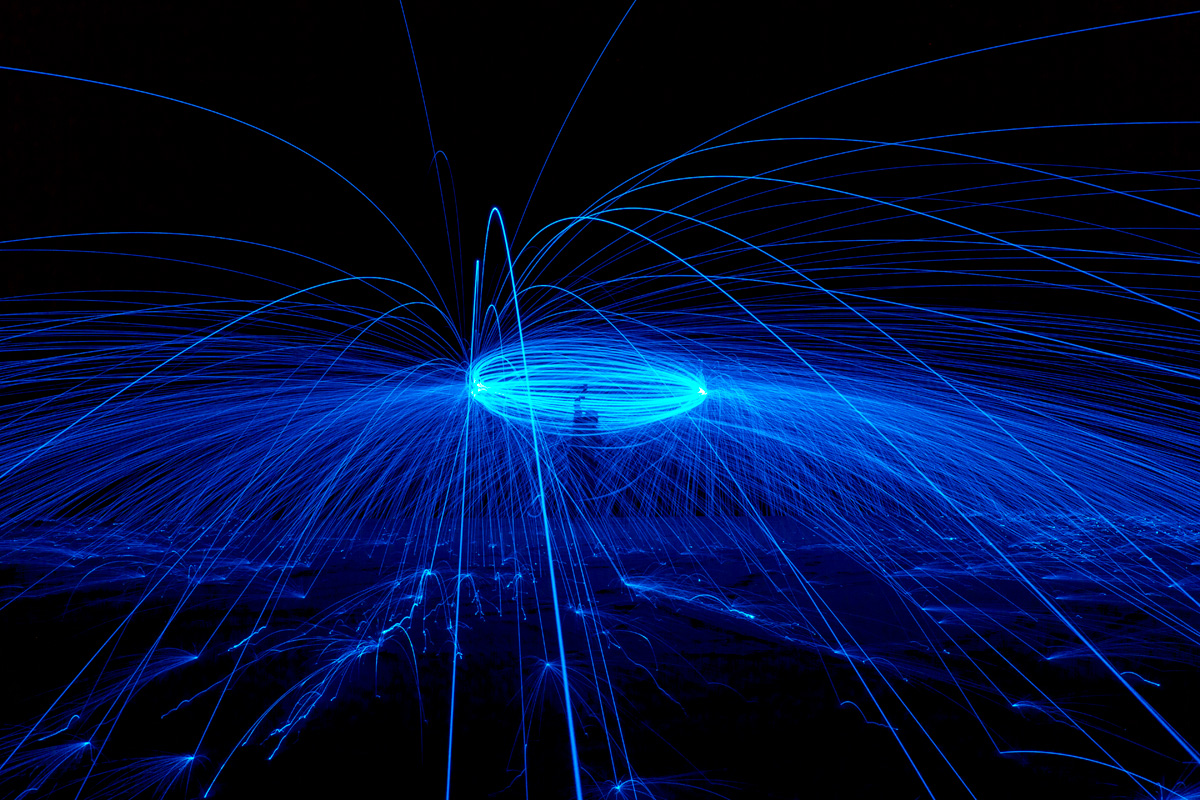
Burning steel wool stuffed into a whisk and spun around overhead creates a great effect but it does present a few risks, to both hair and camera lenses.
Ultimately, light painting can be done nearly anywhere (again, burny things burn …) solo, with friends or even with the family.
Or you can light paint your family.
Hmn ….
Have a great Civic Holiday weekend, everyone ~ cheers!

fabulous. how could you do that?
All manner of ways: flashlights, flares, sparklers… The options are only limited by your imagination. Have fun with it!